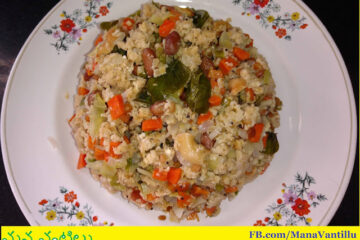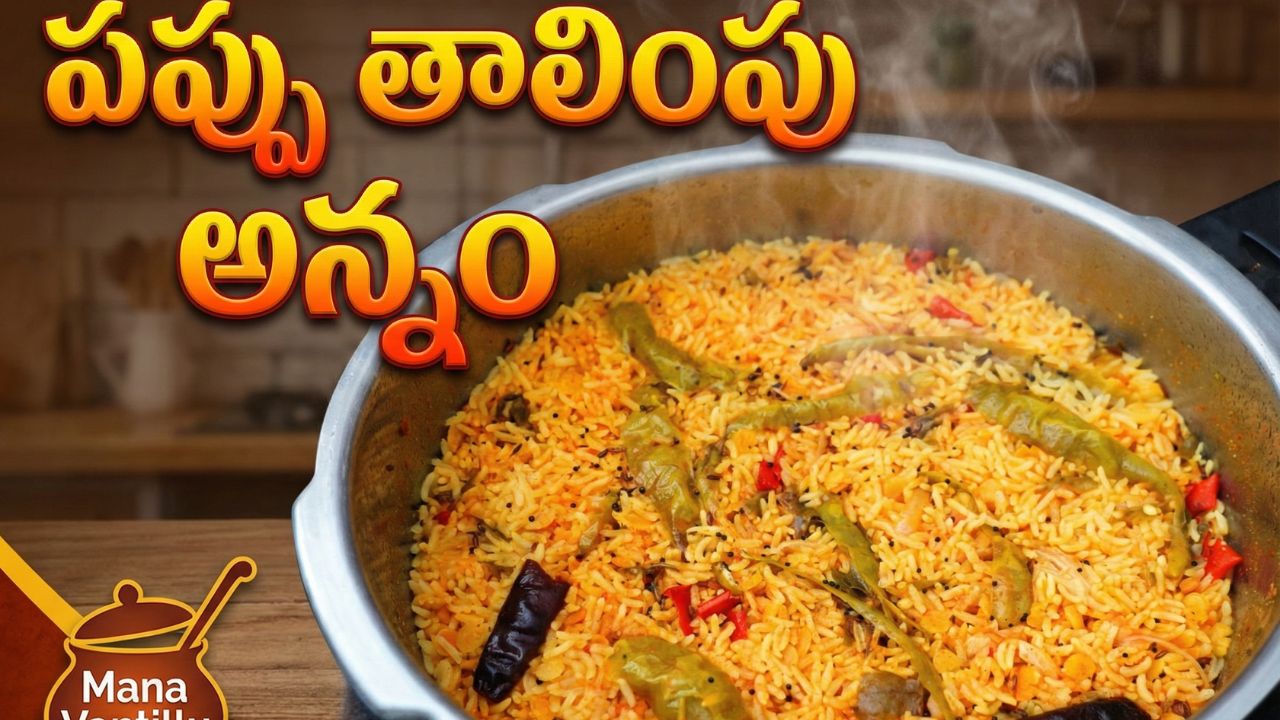
హలో అండి! మన వంటిల్లు కు స్వాగతం. ఈరోజు మనం ఎంతో కమ్మగా, చాలా ఈజీగా చేసుకోగలిగే బెస్ట్ వన్-పాట్ మీల్ (One-Pot Meal) రెసిపీ గురించి తెలుసుకుందాం. అదేనండి.. “పప్పు తాలింపు అన్నం”.
ఇంట్లో కూరగాయలు లేనప్పుడు, ఆఫీస్ కి లేదా పిల్లల లంచ్ బాక్స్ లోకి హడావిడిగా ఏదైనా చేయాలి అనుకున్నప్పుడు ఈ రెసిపీ అద్భుతంగా ఉంటుంది. బ్రేక్ ఫాస్ట్ లేదా లంచ్.. ఏ టైమ్ లో అయినా ఈ కమ్మని అన్నం ఆరగించవచ్చు. మరి ఈ సింపుల్ అండ్ టేస్టీ రెసిపీని ఎలా చేయాలో చూసేద్దామా!
పప్పు తాలింపు అన్నం – ఆరోగ్య ప్రయోజనాలు & డైట్ టిప్స్ (Health & Diet Tips)
రెసిపీలోకి వెళ్లే ముందు, ఈ వంటకంలోని ఆరోగ్య ప్రయోజనాలు తెలుసుకుందాం:
- ప్రోటీన్ పవర్ (Protein Rich): ఇందులో కందిపప్పు వాడటం వల్ల శరీరానికి కావాల్సిన ప్రోటీన్ పుష్కలంగా అందుతుంది. పిల్లల ఎదుగుదలకు ఇది చాలా ముఖ్యం.
- జీర్ణక్రియకు మేలు (Good for Digestion): మనం తాలింపులో వాడే జీలకర్ర, ఇంగువ జీర్ణక్రియను మెరుగుపరుస్తాయి. కడుపు ఉబ్బరం రాకుండా చూస్తాయి.
- డైట్ టిప్ (Diet Tip): బరువు తగ్గాలి అనుకునే వారు, వైట్ రైస్ కి బదులుగా బ్రౌన్ రైస్ లేదా మిల్లెట్స్ (సిరిధాన్యాలు) వాడుకోవచ్చు. అలాగే నూనెకు బదులు కొద్దిగా స్వచ్ఛమైన నెయ్యి వాడితే రుచితో పాటు ఆరోగ్యానికి కూడా మంచిది.
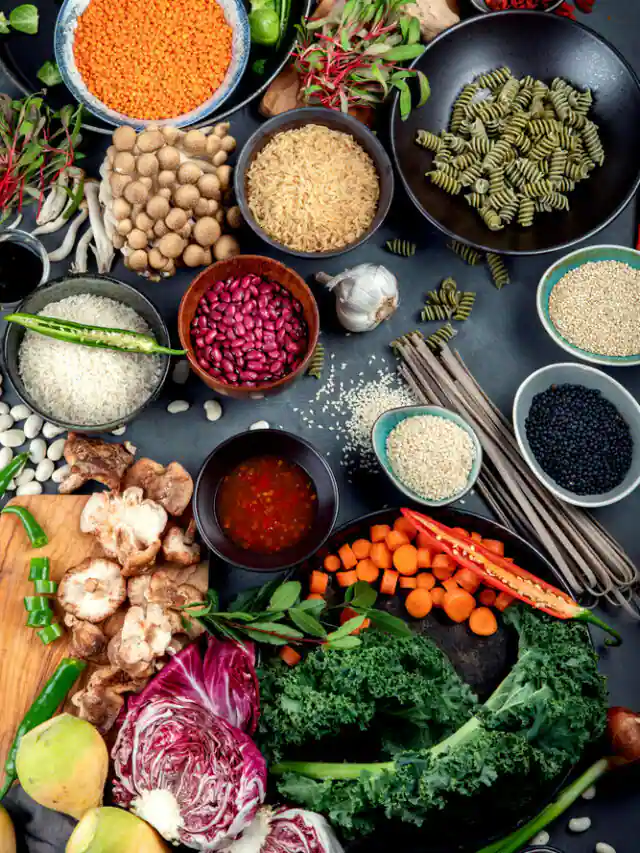
కావాల్సిన పదార్థాలు (Ingredients)
- బియ్యం (Normal White Rice) – 1 గ్లాస్
- కందిపప్పు (Toor Dal) – 1/2 గ్లాస్
- నూనె లేదా నెయ్యి (Oil / Ghee) – 4 టేబుల్ స్పూన్స్
- ఆవాలు (Mustard seeds) – 1/4 టీ స్పూన్
- జీలకర్ర (Cumin seeds) – 1/4 టీ స్పూన్
- పచ్చిశెనగపప్పు (Chana Dal) – 1 టేబుల్ స్పూన్
- మినప్పప్పు (Urad Dal) – 1 టేబుల్ స్పూన్
- కరివేపాకు (Curry leaves) – 2 రెమ్మలు
- పచ్చిమిర్చి (Green chilies) – 5 (పొడవుగా కట్ చేసినవి)
- ఎండుమిర్చి (Dry red chili) – 1 (తుంచినవి)
- ఇంగువ (Hing) – 1/2 టీ స్పూన్
- ఉల్లిపాయ (Onion) – 1 పెద్దది (పొడవుగా కట్ చేసుకోవాలి)
- పసుపు (Turmeric powder) – 1/4 టీ స్పూన్
- టమోటో (Tomato) – 1 పెద్దది (చిన్న ముక్కలుగా కట్ చేసుకోవాలి)
- ఉప్పు (Salt) – రుచికి సరిపడా (సుమారు 1.5 టేబుల్ స్పూన్)
- జీలకర్ర పొడి (Cumin powder) – 1/4 టీ స్పూన్
- గరం మసాలా (Garam masala) – 1/4 టీ స్పూన్
- కారం (Red chili powder) – 1/2 టీ స్పూన్ (మీ స్పైస్ కి తగ్గట్టు)
- ఆమ్చూర్ పౌడర్ (Amchur powder) లేదా కొద్దిగా చింతపండు రసం – 1/2 టీ స్పూన్
- నీళ్లు (Water) – 3 గ్లాసులు
తయారు చేసే విధానం (Step-by-Step Preparation)
- రైస్ & పప్పు ప్రిప్: బియ్యం రెండు–మూడు సార్లు శుభ్రంగా కడగండి. పప్పును బాగా కడిగి, సరిపడిన తాగునీళ్లతో (పప్పు మునగడానికి) ఒక అరగంట నానబెట్టు.
- పాప్ల తయారీ (తాలింపు కోసం): ప్రెషర్ కుక్కరును గరిట మీద పెట్టి మాధ్యమమైన అగ్నిపై (medium heat) 3–4 టేబుల్ స్పూన్స్ నూనె వేడి చేయండి.
- నూనె వేడెక్కిన తర్వాత ఆవాలు (1/2 టీ స్పూన్) వేసి బ్రూత్ అయ్యే వరకు వేయించండి.
- ఆవాలు వేగినప్పుడు జీలకర్ర 1/2 టీ స్పూన్ కూడా వేయండి.
- ఇప్పుడు చాణా దాల్ (1 టేబుల్ స్పూన్) మరియు ఉరద్ దాల్ (1 టేబుల్ స్పూన్) వేసి గోల్డెన్ కలర్ వచ్చేవరకు పేపరు లాగా వేయించండి.
- కరివేపాకు, పచ్చి మిర్చి చీలకలు, ఎండుమిర్చి వేసి కొద్ది సెకన్లు ఫ్రై చేయండి. తరవాత ఇంగువ 1/2 టీ స్పూన్ చల్లి.
- ఉల్లిపాయం & పసుపు: ఇప్పుడు ఉల్లిపాయను పొడవుగా లేదా సన్నగా కోసి వేసి బాగా కలపండి. పసుపు 1/2 టీ స్పూన్ వేసి మిక్స్ చేయండి. మూత పెట్టి ఉల్లిపాయలు లైట్ గోల్డెన్ కలర్ వచ్చే వరకు అడ్డచేయుతూ మధ్యలో కలుపుతూ వేయించండి.
- టమోటో & మసాలాలు: టమాటో ముక్కలు వేసి వాటి మీద 1 టేబుల్ స్పూన్ ఉప్పు చల్లి, టమాటోలు సాఫ్ట్ అయ్యేవరకు మగ్గించండి. తరువాత జీలకర్ర పొడి 1/2 టీ స్పూన్, గరంమసాలా 1/2 టీ స్పూన్, చిల్లీ పౌడర్ 1/2 టీ స్పూన్, ఆమ్చూర్ 1/2 టీ స్పూన్ వేసి బాగా కలపండి.
- నీళ్లు & రైస్–పప్పు మిక్స్: ఇప్పుడు మీరు రైస్ తీసుకున్న ఆSame గ్లాస్తో 3 గ్లాసుల నీరు వేయండి (1 గ్లాస్ రైస్ ఉడకానికి, 1 గ్లాస్ పప్పుకు మరియు అదనంగా ఒక గ్లాస్ మిశ్రమానికి) – ఇది అనుమానాస్పదంగా వినబడేలా ఉంది, కానీ ట్రై-ఏజ్ సమతుల్యంగా పనిచేస్తుంది. నీళ్లు రుచితో బాగా కలిపి ఉప్పు, మసాలాలు సరిపోతున్నాయో చెక్ చేయండి. (ఇక్కడ ఉప్పు తగ్గి ఉంటే చివరగా మీరే ఆడ్జెస్ట్ చేయండి.)
- రైస్ & పప్పు వేసి కుకింగ్: కాకపోతే, ముందుగా నానబెట్టి పెట్టుకున్న పప్పు మరియు కడిగిన బియ్యం మిగిలిన మిశ్రమంలో జత చేయండి. బాగా కలిపి కుక్కర్ మూత పెడండి. 3 విజిల్స్ (3 షికార్లు) వచ్చే వరకే మద్యమ ఫ్లేమ్లో ఉడికించండి.
- రెస్ట్ చేయడం: 3 విజిల్స్ తర్వాత స్టవ్ ఆఫ్ చేయండి. కనీసం 15 నిమిషాలు మూత తీసకండి – దీనివల్ల రైస్లోని మాయిస్्चर ఎవరేపరేట్ అయ్యి అన్నం బరగా, వరకు되지 않고 గుచ్చుగా ఉంటుంది.
- సర్వింగ్: 15 నిమిషాల తరువాత మూత తీసి వేడి వేడి రైస్ ఫ్లఫ్ చేయండి. మీకు ఇష్టమైతే కొద్దిగా కొత్త కొత్త ధనియాలతో గార్నిష్ చేయండి. చక్కగా కలిపినతర్వాత ఇది తినడానికి సిద్ధంగా ఉంది.
ట్రిక్స్ & టిప్స్ (వంటకాల కోసం)
- పప్పు మంచి అవుతున్నారా లేదో చూసుకోండి – పప్పు ఉపరిగానే బియ్యం నెరపుగా మారదు. పప్పు ముందే నీళ్లు చెయ్యడం వల్ల బాగా దగ్గరగా ఉడుకుతుంది.
- నూనె/నెయ్యి తగ్గించాలంటే 2 టేబుల్ స్పూన్స్ నూనెతో కూడా బాగుంటుంది – తక్కువ ఫ్యాట్ కోసం.
- బియ్యం బదులు బ్రౌన్ రైస్ వాడితే కుకింగ్ టైమ్ పెరుగుతుంది; నీటి మోతాదు కూడా పెంచాలి.
- మరింత పోషకదాయకంగా చేయాలంటే ముదురు కూరగాయలు (carrot peas, beans) జత చేయండి – చిన్న ముక్కలుగా కట్ చేసి టమాటో పెట్టేముందే వేసి వేయించండి.
Pappu Talimpu Annam: The Ultimate Quick & Easy One-Pot Dal Rice Recipe
Hello and welcome to Mana Vantillu! Today, we are bringing you a highly comforting, incredibly easy one-pot meal recipe-“Pappu Talimpu Annam” (Dal Tadka Rice).
Whether you are running out of vegetables at home, need a quick lunch box recipe for kids, or just want a cozy, fuss-free meal, this recipe is a lifesaver. You can enjoy this delicious rice dish for breakfast, lunch, or dinner. Let’s dive into how to make this simple and tasty dish!
Health & Diet Tips
Before we start cooking, let’s look at why this dish is good for you:
- Protein-Packed: The use of Toor Dal (pigeon peas) makes this an excellent source of plant-based protein, which is essential for muscle repair and daily energy.
- Gut Friendly: Ingredients like cumin seeds and asafoetida (hing) in the tempering process aid digestion and prevent bloating.
- Diet Hack: If you are watching your weight, swap the white rice with brown rice, quinoa, or millets. Also, substituting oil with pure ghee enhances the flavor and provides healthy fats.
Ingredients Required
- Normal White Rice – 1 glass
- Toor Dal (Kandipappu) – 1/2 glass
- Oil or Ghee – 4 tbsp
- Mustard seeds – 1/4 tsp
- Cumin seeds – 1/4 tsp
- Chana Dal – 1 tbsp
- Urad Dal – 1 tbsp
- Curry leaves – 2 sprigs
- Green chilies – 5 (slit lengthwise)
- Dry red chili – 1 (broken)
- Asafoetida (Hing) – 1/2 tsp
- Onion – 1 large (sliced lengthwise)
- Turmeric powder – 1/4 tsp
- Tomato – 1 large (finely chopped)
- Salt – To taste (approx. 1.5 tbsp)
- Cumin powder – 1/4 tsp
- Garam masala – 1/4 tsp
- Red chili powder – 1/2 tsp (adjust to spice tolerance)
- Amchur (Dry Mango) powder OR a little Tamarind juice – 1/2 tsp
- Water – 3 glasses
Step-by-Step Preparation Method
- Step 1 (Soak the Rice & Dal): Take 1 glass of rice and 1/2 glass of toor dal in a bowl. Wash them thoroughly 2-3 times. Add fresh water and let them soak for about 30 minutes.
- Step 2 (Prepare the Tempering): Place a pressure cooker on the stove and heat 4 tbsp of oil (or ghee). Once hot, add mustard seeds, cumin seeds, chana dal, and urad dal. Roast on low flame until they turn slightly golden.
- Step 3 (Aromatics): Add curry leaves, slit green chilies, dry red chilies, and 1/2 tsp of hing. Fry for a few seconds. The hing adds a wonderful, rich flavor to the dish.
- Step 4 (Sauté Onions & Tomatoes): Add the sliced onions and turmeric powder. Mix well, cover, and cook until the onions turn light golden brown. Next, add the finely chopped tomatoes and salt. Cook until the tomatoes become mushy and soft.
- Step 5 (Spices & Water): Once the tomatoes are soft, add cumin powder, garam masala, red chili powder, and amchur powder. Mix well. Pour in 3 glasses of water (2 glasses for the rice, 1 for the dal). Stir well and check the salt and spice levels; adjust if necessary.
- Step 6 (Pressure Cook): Bring the water to a boil. Drain the water from the soaked rice and dal mixture, and add it to the boiling water. Stir everything together. Close the pressure cooker lid and cook for 3 whistles on medium flame.
- Step 7 (Rest & Serve): Turn off the stove after 3 whistles. Let the cooker rest for 15 minutes to allow the steam to release naturally. This resting period helps any excess moisture evaporate, ensuring the rice cooks softly. Open the lid and mix gently. It might look slightly sticky while hot, but it will fluff up nicely as it cools.
Serve this hot, comforting Pappu Talimpu Annam and watch your family enjoy it! Try this recipe at home and let us know your feedback in the comments. For more interesting and delicious recipes, stay tuned to Mana Vantillu. Thank you for reading!